Recently I worked on a project where I needed to receive DMX commands into an Arduino. All I had on hand was a Tinkerkit Master DMX shield.
I wasn’t able to find a whole lot of documentation on how to read DMX with the Tinkerkit shield, as the shield is primarily designed for transmitting. After digging around a bit on the net, I was able to make it work.
DMXSerial seemed to be a solid library that I wanted to use in my project. DMXSerial uses the hardware serial port on the Arduino to ensure proper timing.
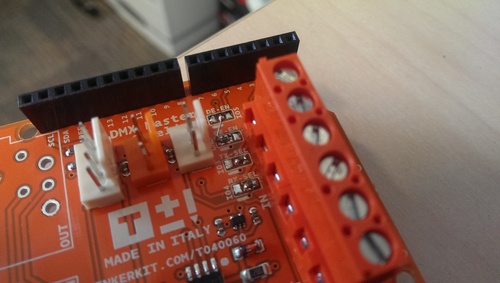
To make the Master DMX shield work with DMXSerial, you’ll need to flip the two resistors on the sheild labeled TX-Select and RX-Select. This will cause DMX data to be transmitted on the Arduino’s TX/RX UART pins (watch out, you won’t be able to load code with the shield on!). DE-Enable then needs to be connected to GND. This can be done by connecting the DE-Enable pad directly to the GND pin on the RE-ENABLE jumper (bypassing the resistor).
Edit: If you take a look at the schematic for the DMX Shield http://www.inmotion.pt/documen… you can see that R2 and R4 are labeled as “0R”. That means they’re not resistors at all…they’re wires! 0 ohm resistors or “wires” are handy because they effectively act as little jumpers to select different modes. Since we don’t want DE-EN connected to VCC or J1, the closest pad to jump to for GND is RE-EN. What we're doing here is configuring the chip on the DMX shield to function as a DMX receiver.
Once you have made these modifications, you’re good to go for using the Master DMX shield for receiving DMX commands.
Edit: Added photo for clarification.